1.0 Overview
MuleSoft developers around the world would be able to identify with me their challenges and issues when they are infusing Groovy scripts into their Mule applications. The challenge here is not so much about creating snippets of Groovy scripts in the mule application but more about creating reusable groovy scripts in MuleSoft. As of this writing there is no online content that will teach you how to create reusable Groovy scripts, the search results that appears would talk about SOAP UI groovy scripts but you will find nothing that is relevant to what you need.
This article would attempt to teach the reader on how to write reusable groovy scripts and the best practices in infusing groovy scripts into their Mule applications.
2.0 Installing the groovy IDE plug-in
Launch the Anypoint IDE, and at the top menu on the upper left hand conner go to Help > Install New Software, this will launch the “Install” pop up dialog, once there click on the add button on the right hand corner of the first text box (as depicted in Figure 2.0a).

Figure 2.0a
Once the button is clicked you will see another pop up dialog asking for Name and Location (Figure 2.0b).
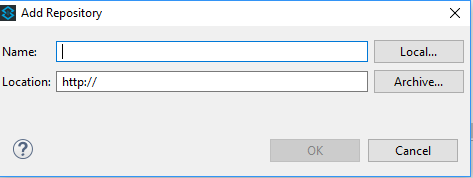
Figure 2.0b
Enter the following name and location into the popup at Figure 2.0b.
- Name :groovy plugin
- Localtion :http://dist.springsource.org/snapshot/GRECLIPSE/e4.5/
Once this is done, you will see that the install dialog would display the following selection for installation, proceed to select all of them (Figure 2.0c), and click next to proceed with installation.

Figure 2.0c
Once installation is completed on your Anypoint IDE proceed to the following section (3.0).
3.0 Creating the groovy package
You need to create a new mule project in the Anypoint IDE, once that is done you need to create a subfolder under src/main/resource. The new folder that you are creating would be the package root folder from which your groovy file will reside.
Now Create a new groovy file called “HelloWorld.groovy”. The entire structure of your file would be as the following (Figure 3.0a).

Figure 3.0a
Enter the following snippet of code into the file.
package groovystatic String greet(){
println "Hello how are you !!!" return "Hello how are you!!!" } |
So what you have essentially done is that by naming the file “HelloWorld.groovy” you are implicitly creating a java class called “HelloWorld” when you create method/functions in the file you are essentially creating function/methods in the “HelloWorld” class. The first statement in the class is the package name which should be the same as your folder name.
4.0 Incorporating the groovy script
Right after creating the groovy script file in section 3.0 we are now ready to incorporate it into our mule application. We will create a simple mule application that looks like the following (Figure 4.0a).

Figure 4.0a
The second message processor is the “groovy scripting message processor”, in the groovy scripting message processor configuration are as displayed below (Figure 4.0b).

Figure 4.0b
And it is that easy to reuse groovy scripts, if you follow my way of creating reusable scripts, you will no longer need to use the “Script File” configuration (displayed in Figure 4.0b).
Full Mule XML code are as listed in the following snipped.
<?xml version="1.0" encoding="UTF-8"?>
<mule xmlns:http="http://www.mulesoft.org/schema/mule/http" xmlns:scripting="http://www.mulesoft.org/schema/mule/scripting" xmlns="http://www.mulesoft.org/schema/mule/core" xmlns:doc="http://www.mulesoft.org/schema/mule/documentation" xmlns:spring="http://www.springframework.org/schema/beans" xmlns:xsi="http://www.w3.org/2001/XMLSchema-instance" xsi:schemaLocation="http://www.springframework.org/schema/beans http://www.springframework.org/schema/beans/spring-beans-current.xsd http://www.mulesoft.org/schema/mule/core http://www.mulesoft.org/schema/mule/core/current/mule.xsd http://www.mulesoft.org/schema/mule/http http://www.mulesoft.org/schema/mule/http/current/mule-http.xsd http://www.mulesoft.org/schema/mule/scripting http://www.mulesoft.org/schema/mule/scripting/current/mule-scripting.xsd"> <http:listener-config name="HTTP_Listener_Configuration" host="0.0.0.0" port="8081" doc:name="HTTP Listener Configuration"/> <flow name="testgroovyFlow"> <http:listener config-ref="HTTP_Listener_Configuration" path="/test" doc:name="HTTP"/> <scripting:component doc:name="Groovy"> <scripting:script engine="Groovy"><![CDATA[groovy.HelloWorld.greet()]]></scripting:script> </scripting:component> </flow> </mule> |
5.0 Debugging the Groovy Script
If you follow what I have showed you so far and incorporate the practice in all your mule applications you could even debug the groovy script that you have written (apparently there are people who believe that they can never debug groovy scripts in mule applications, this article will prove them wrong). If you set breakpoints in the following locations (Figure 4.0a and Figure 5.0a), you will able to stop execution at the following points during runtime.

Figure 5.0a shows the blue dots as breakpoints.
Now run the application in debug mode and in your internet browser, browse to the following URL http://localhost:8081/test. You will now see that the runtime execution stops at the first break point (Figure 5.0b).

Figure 5.0b
If you move move forward from the first break point, the debugger will move into the groovy script (Figure 5.0c).

Figure 5.0c
This shows that using the following way in creating groovy scripts in your mule application, not only encourages reuse, but also allows for groovy scripts debugging, this will be really helpful when you have complex groovy scripts to debug.
6.0 Conclusion
When you create groovy scripts using the method I have shown you, then you will only need to enter minimal groovy statements at the groovy message processors, and you could leave all the heavy lifting to the scripts declared in the script files, doing it this way would also allow you to build groovy scripts independently from your mule ide and test the groovy script independently to ensure it works before actually using them in the mule application (this will speed up development time tremendously).
Nice post.. well written 👍
ReplyDeleteThanks Mate Its really helpful
ReplyDeleteThank you for reading the article
ReplyDeletethe blog is good and Interactive it is about Mulesoft API Developer it is useful for students and Mulesoft Developers for more updates on Mulesoft mulesoft Online training bangalore
ReplyDeleteGreat article ...Thanks for your great information.
ReplyDeleteMulesoft Online Training
Thanks for sharing this blog.This article gives lot of information.
ReplyDeleteMuleSoft Online Training
MuleSoft Training in Hyderabad
Nice One, It is very informative looking for further blog.
ReplyDeletemulesoft training
mulesoft online training
ReplyDeleteThank you for sharing wonderful information with us to get some idea about that content.
Best Mulesoft Training
Mulesoft Course Online
Mulesoft Training and Certification
Mulesoft Architecture Certification
Mulesoft Course
Mulesoft Developer Certification
Mulesoft Self Learning
Mulesoft Online Training in India
Mule 4 Online Training
Mulesoft Online Training india
Mulesoft Online Training in Hyderabad
Mulesoft Online Training Hyderabad
I have found great and massive information on
ReplyDeleteWorkday payroll training
Workday financials training
Workday Online training
Python online training
Mulesoft Online training
Servicenow Online training
which helps you also. Thanks for Posting
It is so nice blog. I was really satisfied by seeing this blog.
ReplyDeletemulesoft online training in India
mule 4 online training
I really liked your blog article.Really thank you! Really Cool.
ReplyDeleteMulesoft training
python training
angular js training
selenium trainings
Nice and good article. It is very useful for me to learn and understand easily. Thanks for sharing
ReplyDeleteMule 4 Training
Best Mulesoft Online Training