1.0 Overview
This article will walk the user through on the detail steps that is necessary to set up and run and ubuntu linux box on the azure cloud platform. This article will be the basis for users to set up linux sandbox on which we could use to further set up containers, and use those containers to run Mule applications.
2.0 Setting up the Ubuntu Linux Box
First you need to login to azure portal. Upon loggin in to azure portal you will see the following screen (depicted at Figure 2.0a)

Figure 2.0a
Click on the plus sign (+) at the top left corner of the screen. Then click on create ubuntu server as highlighted in Figure 2.0b

Figure 2.0b
At Figure 2.0c you will be prompted to key in some server details, key in the name of the server at the first text box, then retain default vm disk type. The third text box will be the root user name, that you will be using both for SSH putty and also for remote desktop later, choose authentication type as password. The following list box would be a subscription that you are on, select a valid subscription. Following that would be the resource group if you don't have an existing resource group create one else use an existing one. The last text box is the location text box, choose the correct location that would be closest to your place of residence, i.e. as I am trying to connect from New Zealand, so I have chosen the locaiton to be “Australia Southeast”.

Figure 2.0c
After keying all fields click on ok and you will be brought to a page depicted by Figure 2.0d

Figure 2.0d
Select an option from Figure 2.0d that would fit your computing needs, for demo purpose I have selected the option with the least computing resource. When you click select, you will be brought to screen Figure 2.0e, for cost conservation remember to select the Auto Shutdown option and specify the time for the auto shutdown to happen.
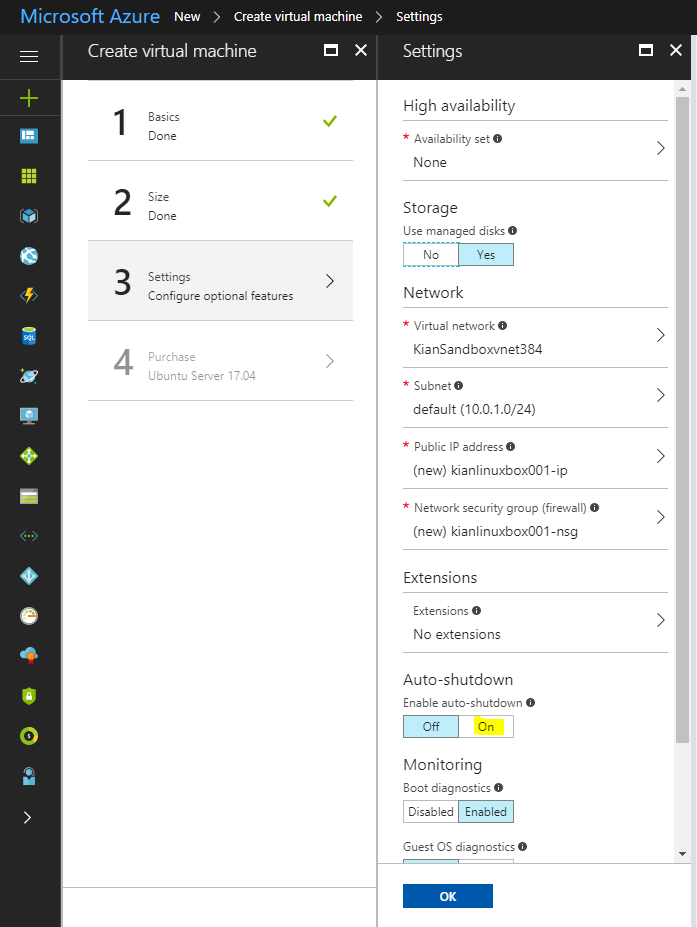
Figure 2.0e
When you click ok you will be brought to the purchase screen, click on acceptance of the agreement and you will proceed to the following screen (Figure 2.0f).

Figure 2.0f
Here you just need to wait for a few minutes for the server to be booted up, this is the time where you will need to download and install putty if you don't have one running on your machine. Once your application is up and running you will see the following screen (Figure 2.0g)

Figure 2.0g
At Figure 2.0g click on the IP address as per highlighted, you will be brought to another configuration screen (Figure 2.0h) here key in the host name and click save.

Figure 2.0h
The we are configuring the hostname is so that we don't need to use the IP address to both putty and also to remote desktop to the linux server. Upon successful configuration and if you click back on the overview menu, you will see the DNS name, this is the hostname that you can use to putty and remote desktop to the linux server (depicted in Figure 2.0i).
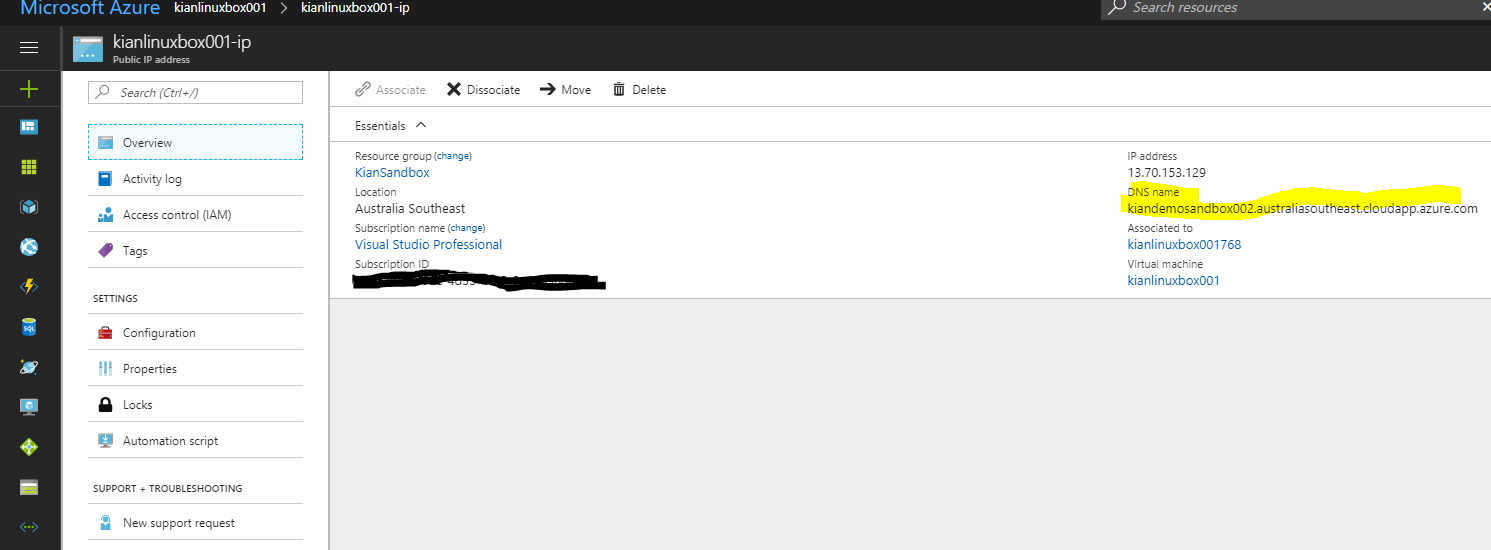
Figure 2.0i
3.0 Putty SSH Connection to Set Up Linux box
Cut and paste the DNS name string in Figure 2.0i to the host name text field at the Putty Screen at Figure 3.0a and click on the Open button.

Figure 3.0a
First time connecting to the server using putty you will get the following screen (Figure 3.0b).

Figure 3.0b
Any second connect or any other subsequent connection the pop up at Figure 3.0b would not appear again, just click on the yes button. Next you will be prompted with the username and password that you have previously configured in Figure 2.0c. Upon a successful log in you will see the following screen depicted in Figure 3.0c.

Figure 3.0c
Once you see this screen it is time to update the ubuntu distribution, you need to type in the following command.
sudo apt-get update
|
When update is finished you will see the following screen

Figure 3.0c
Now run the following command
sudo apt-get install ubuntu-desktop
|
And key in “Y” when prompted (as depicted in Figure 3.0d), and installation will commence, you will need to wait for 30 minutes for it to finish installation.

Figure 3.0d
When installation of Ubuntu Desktop is done you need to run the following command to install XRDP so that we could remote desktop to the server.
sudo apt-get install xrdp
|
Once XRDP is successfully installed run the following command to start the rdp daemon, without starting the XRDP daemon/service users cannot remote desktop to the linux box.

Figure 3.0e
sudo /etc/init.d/xrdp start
|
If the command executes successfully you will get the following screen (Figure 3.0f), with a green ok started status.
 Figure 3.0f
The following command is for restarting XRDP
sudo /etc/init.d/xrdp restart
|
Now you will need to execute the final command to reboot the server.
sudo shutdown -r now
|
You need to restart the server for all the changes to take effect, remember to start up xrdp, after server reboot.
4.0 Adding RDP port to the New VM
After starting up the XRDP service, you would now need to head back to the azure portal to open the port for XRDP connection. Go back azure portal select the linux box and go back to the overview screen, from the overview screen select the “Network Interface” (Figure 4.0a).

Figure 4.0a
Next click on the highlighted security group in Figure 4.0b.
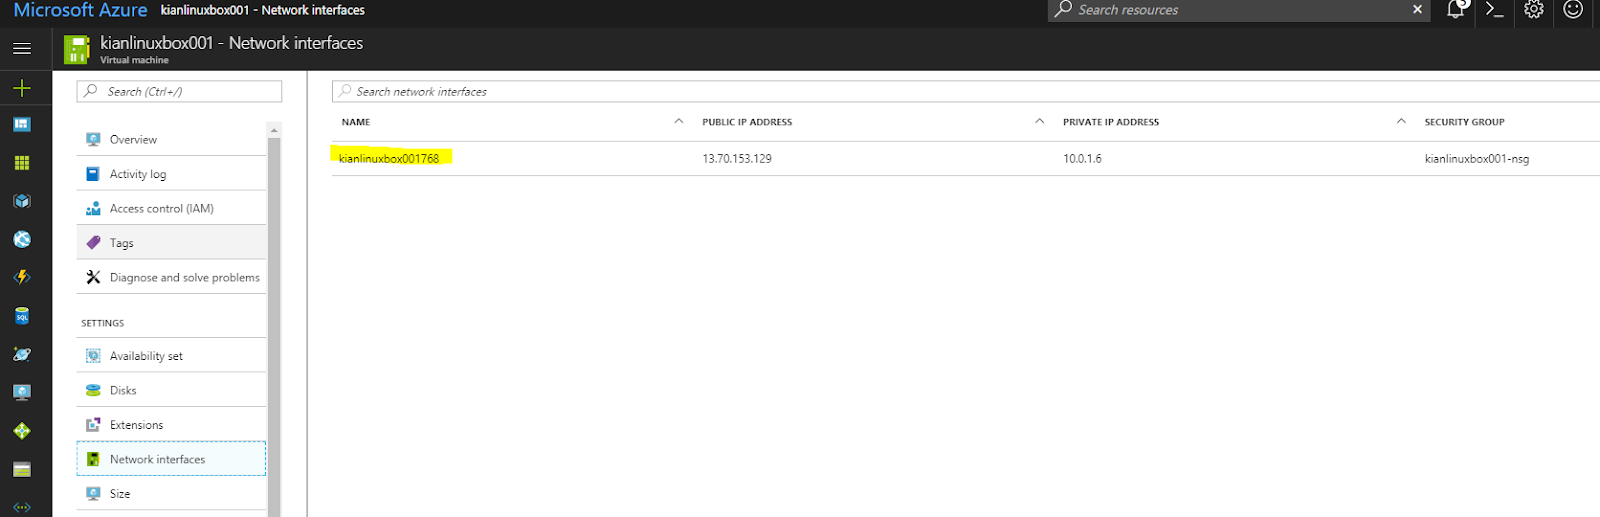
Figure 4.0b
Now click on the Network Security group and click on the hyperlink displayed on the right pane at figure 4.0c

Figure 4.0c
Now click on inbound security and click on add (Figure 4.0d)

Figure 4.0d
Next add port 3389 for XRDP in the following depicted pop up screen (figure 4.0e) and click save.

Figure 4.0e
Upon successful addition of the port, your screen would look like Figure 4.0f.

Figure 4.0f
5.0 Remote desktop connection to the Linux Box
If you are using a windows environment as I am, bring up the remote desktop connection dialog and cut and paste the DNS name from figure 2.0i, to the computer text box at Figure 5.0a.

Figure 5.0a
Upon a successful connection you will be prompted with a XRDP login screen (depicted in Figure 5.0b).

Figure 5.0b
Once you are successfully in you will only see darkness, don’t worry, this is because the UNITY desktop manager is not started, here you need to right click and select open terminal.
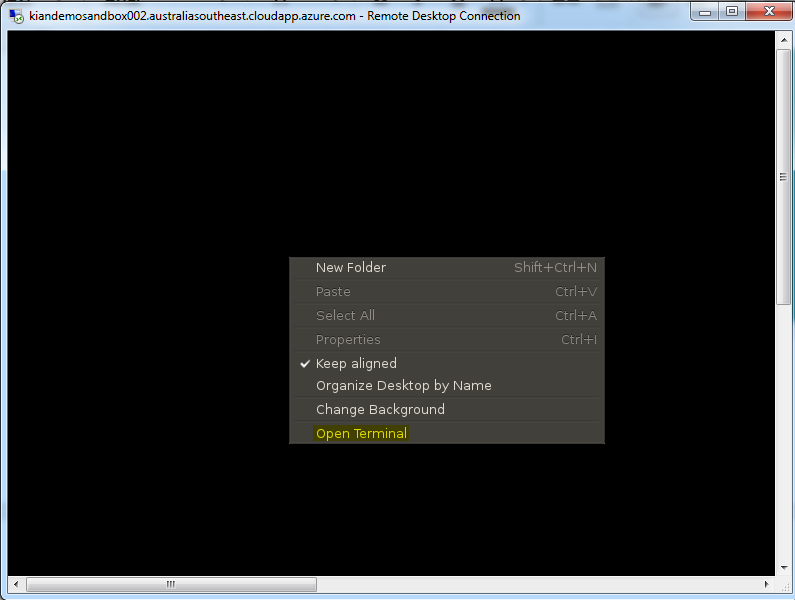
Figure 5.0c
Once terminal is opened inside remote desktop, I want you to type in the following command and press enter.

Type this command and press enter.
exec unity
|
When unity desktop manager is successfully started you will see the following screen.

And this concludes this article, stay tune for the coming ones as we will explore setting up dockers in the ubuntu box.
No comments:
Post a Comment