1.0 Overview
We will create a sample mule application that accepts HTTP request and queries the full results from a table in a database. I will use Derby in memory DB for this demo. The next section will talk about how you could set up the database. Please click on the following link to read more about Apache Derby.
Most of the online MuleSoft tutorial teaches you how to run Derby DB in embedded mode, here I will teach you to run it in server mode, which means you do not need to set up any spring bean and create any customized database initialization java codes, no none of these jiggery pokery stuff (as any kiwi would say, aye).
The other benefit of running a Derby in server mode is that you can keep reusing the database for any lab work you plan on doing, and I could keep reusing it to teach you new stuff.
The other reason I am writing this article is that I have posted a question to forums asking if we could mock database end points, the answers that I am getting ranges from nope, to may be, to I don’t know. The answer to the question is a resounding yes, you could absolutely mock a database endpoint response, and if you follow me through the article I will show you how this can be done.
Section 4.2 will show you how this can be done directly but I urge you to go through the whole material so that you could follow the story, as it builds up quite nicely bit by bit to section 4.2, so let the adventure begin.
2.0 Creating the Derby Demo DB
I am setting up the Derby in memory database from a windows environment, for more details you can refer to the following link.
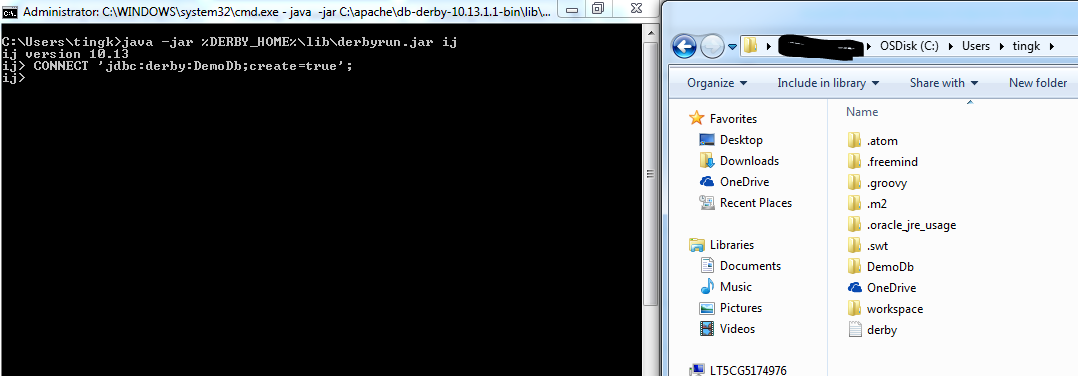
- Execute the following command in command prompt
java -jar %DERBY_HOME%\lib\derbyrun.jar ij

- The Execute the following command
CONNECT 'jdbc:derby:DemoDb;create=true;user=me;password=mine';
Notice that after you have executed the command you will see a DemoDb folder reflecting your execution.
- Next you need to execute the following SQL file, you can get the SQL file from github.
You can just click on the link, copy the SQL scripts and paste it into the command prompt and press enter.
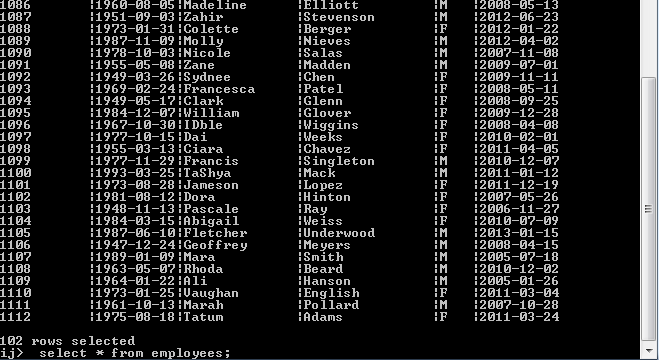
- In order to test if everything is successful execute the following select statements
select * from employees;
If your tables are created successfully you will see the following printed in your command prompt.
2.1 Starting the Derby Demo DB
- Before you start the DB in the same command prompt you need to set the derby.system.home environment variable. Execute the following command.
set derby.system.home="C:\apache\db-derby-10.13.1.1-bin\DemoDb"
- Run the following command
setNetworkServerCP.bat
- Starting up the DB server, open a new command prompt, execute the following command.
startNetworkServer -h 0.0.0.0 -p 1527
The following will show that server is started.

3.0 Creating the Mule Application
The mule application that we will be creating is pretty straight forward it connects directly to the Derby database and it queries the employee table.
It is a simple application depicted by Figure 3.0a

Figure 3.0a
The solution files will contain both the implementation and the global.xml mule configuration files as depicted in the following diagram.
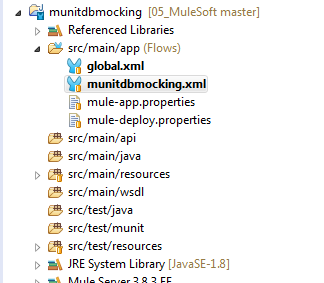
Figure 3.0b
I separated out the global configuration from the actual mule flow implementation, so that I could show you how you can conduct integration testing on a flow that have multiple dependencies across different mule configuration files.
The global.xml mule configuration files has no mule flows in them, it is only populated with global configurations. The following illustration (Figure 3.0c) depicts only 2 global configuration items.

Figure 3.0d
The generic database configuration item looks like the following, there is nothing being configured in any of the other tabs. I have only configured the generals tab.

Figure 3.0e
At the bottom of the configuration screen there is a “Test Connection” button, click on it to confirm if the database has been started, if database has already been started you will see the following dialog (Figure 3.0f).

Figure 3.0f
3.1 Sending HTTP request to the Mule Application
This is a simple mule application, every time when there is a HTTP request it will log/insert a record to the CALL_LOG table, and it would then proceed to select all records from the employee table (from the derby database).
Let’s fire the mule application up and I will show you what I mean.
Open up Postman and issue a GET request to the following URL.
http://localhost:8081/employees
You do not need to key in any query parameter, your Postman screen will look like the following (Figure 3.1a).
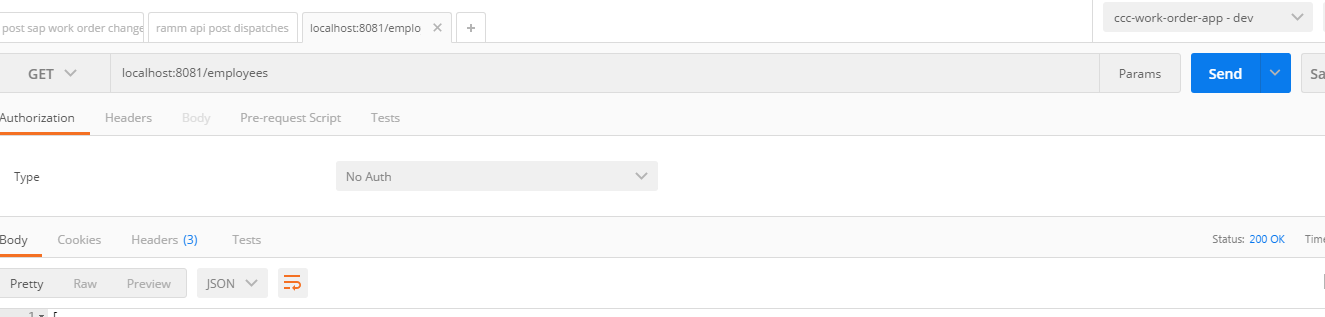
Figure 3.1a
Once you have click send you will get back a JSON payload that is full of employee data.

Figure 3.1b
On your Any point studio mule console you will see the following being logged.

Figure 3.1c
Notice the “executionTimeStamp” log, now open another windows command prompt and execute the following command.
java -jar %DERBY_HOME%\lib\derbyrun.jar ij
Which will bring up te ji console for derby database connection.
At the ij console type the following command and press enter
connect 'jdbc:derby://localhost:1527/DemoDb';
You will now be connected to the derby database. Once in I want you to execute the following select statement.
Select * from call_log;
You will see the following selected result set Figure 3.1d.

Figure 3.1d
Notice that the “executionTimeStamp” is the same as what is printed in the Anypoint console log.
4.0 Creating MUNIT test
Now that we have a clear understanding of what the created Mule application is meant to be doing, we will then proceed to create a MUNIT test for it. As depicted at Figure 4.0a, I need you to right click on the flow and from the menu go to Munit, and select “Create new munitdbmocking.xml suite”.

Figure 4.0a
Immediately following that mouse click earlier you will see a Munit flow being created for you.
 Figure 4.0b
If you go to the global elements tab (in Figure 4.0c), you will see that munit has only imported one mule configuration.

Figure 4.0c
We must now create another import to also include the global.xml, in order to do this you need to click on the create button, select bean and under it select import (Figure 4.0d).
Figure 4.0d
Type in “classpath:global.xml” in the text box (Figure 4.0e)

Figure 4.0e
Now we have all the dependencies sorted, we need to construct the HTTP initialization message (as if we are executing the mule application from postman) Figure 4.0f.

Figure 4.0f
Next I add in an assert payload. I have created a payload JSON file in test resources named “expectedPayload.json”, and referred to it in the “Assert Payload” MUNIT message processor. The reason I am doing this is so that I do not obscure the MUNIT configuration files with unnecessary hardcoded payload values.
4.1 Running the MUNIT test
Next we are going to run the MUNIT test, but before we do that I want you to delete all records from the CALL_LOG table.
Right click on the blank area of the MUNIT configuration widow and select run as in Figure 4.1a

Figure 4.1a
After a successful MUNIT test run you will have a test windows that shows green, this means all your test have executed successfully (Figure 4.1b).

Figure 4.1b
Now if you go back to the command prompt console, try and select records from the call_log table.

You will notice that the MUNIT test have executed an integration test for you and have written to the call_log table. Now this is inconsequential if you are doing a lab exercise, imagine if this would happen in production, where you have accidentally executed MUNIT test against production configuration. Imagine the horror of finding out all your production systems populated with MUNIT test data, it’s horrible it’s utterly horrible, it give me the mere possibility of that happening gives me the heebie jeebies.
4.2 Mocking Database Endpoints
This is why we must mock certain endpoints and this is why we are here not to mock the database. Endpoints. Let’s mock the end point where we are writing to the database. Drag a Mock message processor to the MUNIT test case (figure 4.2a) and select the highlighted message processor.

Figure 4.2a
When we tested the mule application in section 3.1 we could see from the console log that an insert DB operation would create a payload of “1”, so let’s configure this into the mock, and click save. Upon completion of your mock configuration would look similar to the following depiction (figure 4.2b).

Figure 4.2b
With the mock configure now lets rerun the MUNIT test, the Anypoint console would display the same format of log messages as per our previous MUNIT test (Figure 4.2c).

Figure 4.2C
Now if you go back to the ij derby console and run a select against the CALL_LOG table, you will see that there is no new records being created (Figure 4.2d). We have successfully mock database insert message processor sparing MUNIT from needing to execute the real insert DB operation in the original flow implementation.
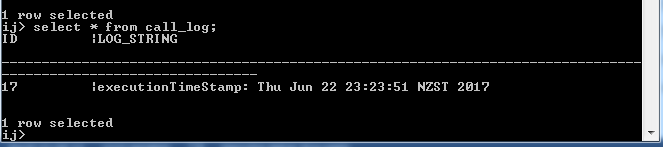
Figure 4.2d
5.0 Conclusion
The Mock message processor in MUNIT can be used to mock any message processor, you just need to import all the dependant mule configuration XML files. I was having issues doing this when I first started, I couldn’t find the message processor I wanted to mock, and I found out the root cause of it was because I have not imported the dependant mule XML configuration. I am sure this mistake trips a lot of mule developers up. If you have read this article in its entirety you will be spared of the mistake.
The full source code including the MUNIT test case can be obtained from the following link:-
the blog is aboutDocument ID field in ServiceNow it is useful for students and Mulesoft Developers for more updates on Mulesoft follow the link
ReplyDeletemulesoft Online Training Bangalore
For more info on other technologies go with below links
Python Online Training
tableau online training hyderabad
ServiceNow Online Training
This comment has been removed by the author.
ReplyDeleteThis concept is a good way to enhance the knowledge.thanks for sharing..
ReplyDeleteMuleSoft Online Training
MuleSoft Training in Hyderabad
Very informative post for mulesoft developers.You can also visit goformule.com for mulesoft stuff.
ReplyDeleteThanks for sharing valuable information and very well explained. Keep posting.
ReplyDeletemulesoft training
mulesoft certification